You move dirt, pour concrete, and hit milestones. Water should not be the thing that slows you down. With the right approach to pump selection, sizing, and setup, you keep excavations workable, protect adjacent assets, and stay compliant. Choosing construction dewatering pumps with a methodical process gives you predictable drawdown, fewer callouts at night, and a cleaner handover to the next trade.
Why construction dewatering pumps matter on your job
You are fighting two opponents: groundwater pressure and weather. Both can flood trenches, lift slab forms, and destabilize trench boxes if you are not ahead of inflow. A well-chosen pump configuration lowers the groundwater table to a safe elevation, creates a flooding margin for storms, and holds enough capacity to adapt.
Dewatering is not just about keeping the hole dry. It is also about controlling silt, meeting discharge permits, and reducing rework. If you plan the priming method, suction lift, and discharge treatment together, your crew spends less time troubleshooting air leaks and more time placing steel.
What Is Construction Dewatering?
Construction dewatering lowers or controls the water level in and around excavations, trenches, shafts, tunnels, and foundations so you can work in stable, dry ground. You draw down the groundwater table using sump pumping, wellpoint systems, deep well dewatering, or eductors, then discharge water either to a storm system, surface water, or a treatment train onsite.
Permitting governs what you may discharge and how you monitor it. In the United States, most projects fall under the Clean Water Act framework. Discharges to surface waters typically require NPDES coverage, and construction sites commonly use the EPA Construction General Permit. Expect turbidity or TSS limits, sampling, and recordkeeping. The 2017 CGP outlines monitoring for dewatering effluent and limits like monthly average TSS near 50 mg/L, with daily maximum thresholds, and requires documentation of sampling and corrective actions. States may impose different, often stricter conditions. A common example is a benchmark that downstream turbidity cannot exceed upstream by more than 50 NTU, which triggers immediate BMP checks and adjustments when exceeded.
You cannot treat the discharge as an afterthought. Your hydraulic design must match water quality expectations. This might mean adding settlement tanks, filter bags, or a flocculant system before outfall, especially in fine silts and clays where simple settling is too slow to meet permit values. Discharges to storm sewers usually require municipal approval, and many authorities will insist on pretreatment, skimming inlets, and documented sampling results.

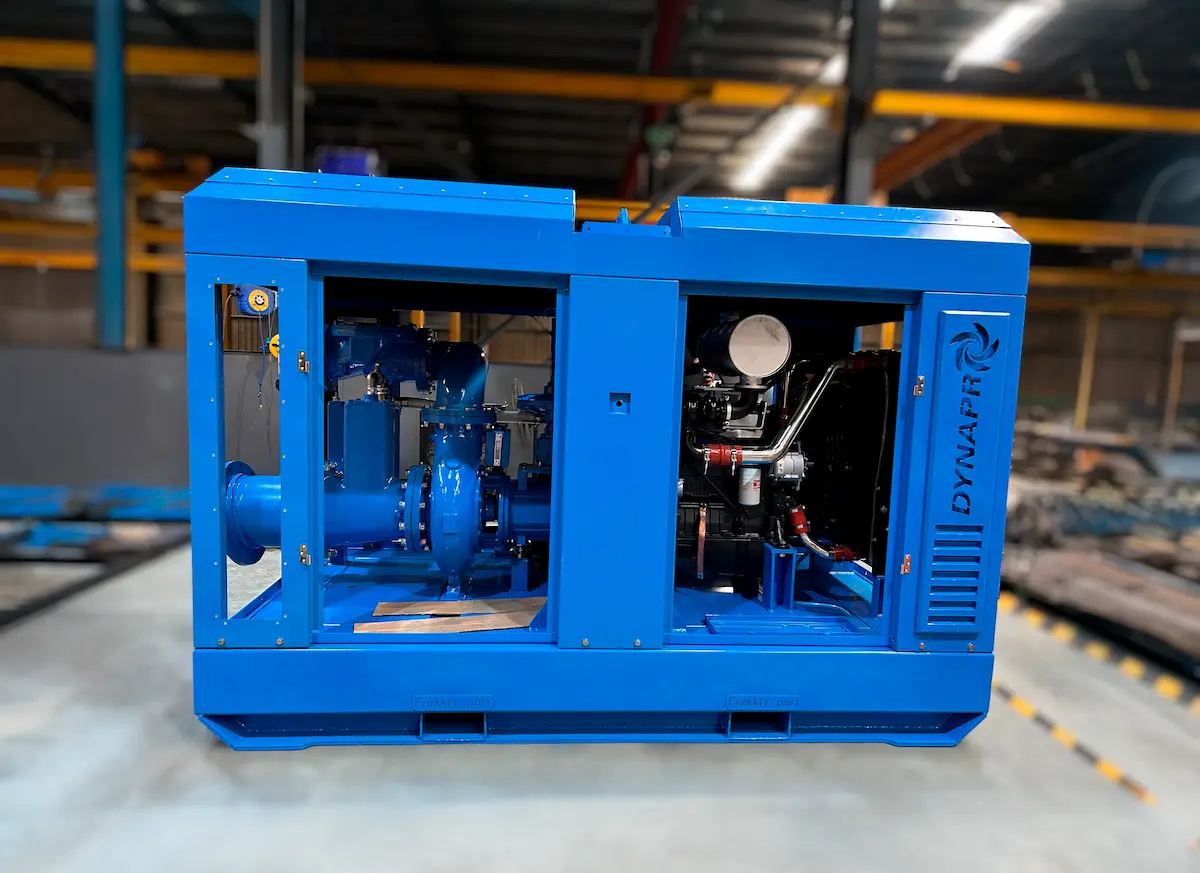
Pump Types for Construction Sites
Choose the pump type for what the water carries and how far, up, and out you need to move it:
- Self-priming trash pumps, usually diesel-driven centrifugal units with vacuum assist or dry-prime features, are your workhorses for sump pumping. They tolerate debris, pass larger particles, and allow surface access for quick service. Best on short suction runs with suction lift kept within 7 to 8 meters in practice.
- Submersible drainage or slurry pumps sit in the water with flooded suction, no priming risk, and low noise. Electric drives are ideal in urban projects and tunnels. You pick solids-tolerant impellers for gritty sites.
- Diaphragm pumps handle thick slurries and entrained solids when a centrifugal would clog or burn seals. Output is modest, but they can run dry without damage and are reliable for sludge pockets and by-pass pumping around sediment traps.
- Wellpoint systems connect strings of shallow wellpoints to a header and a vacuum/centrifugal pump. They draw down groundwater around an excavation in permeable sands and gravels to depths typically within 6 to 8 meters per stage.
- Deep well dewatering uses borehole pumps installed in individual wells around deep cuts or shafts. Each well handles high head and flow; a ring of wells can control a large excavation.
A compact comparison:
| Pump type | Where it shines | Watchouts |
|---|---|---|
| Self-priming trash (diesel) | High inflow, dirty water, easy access for service | Suction lift limits, air leaks, engine noise |
| Submersible drainage/slurry (electric) | Quiet, flooded suction, long runtimes | Power availability, cable protection |
| Diaphragm | Heavy slurries, intermittent sludge pockets | Lower flow, pulsating discharge |
| Wellpoint system | Shallow drawdown in permeable soils | Setup time, header vacuum integrity |
| Deep well | Deep cuts, high-permeability aquifers | Drilling cost, individual well maintenance |
Tie the method to your geology and the structure. For shallow utility trenches in sands, a wellpoint header and a vacuum assist pump can hold drawdown while you advance. For basement slabs on rock with perched water, simple sump pumping with a trash pump into a settlement tank may be enough. For a deep shaft, spec deep wells to pre-lower the water table before you excavate.
Quick Sizing: Flow, TDH and Hose Friction
Your pump has to hit two numbers: the flow you must move, and the total dynamic head you must overcome. You can size quickly with a field-ready process:
- Estimate inflow, add margin
- Use site pump tests where available. If not, base on soil permeability and exposure, then add a 20 to 30 percent safety factor for storms and variability. Keep a flooding margin by allowing spare capacity, especially when rain is forecast.
- Calculate static head
- For a surface pump with suction lift, static head includes the vertical lift on the discharge side plus the suction lift at the inlet. For a submersible with flooded suction, static head is simply the elevation difference to the discharge point.
- Estimate friction losses
- Include hose or pipe runs and fittings. Keep velocities moderate to limit head loss while staying high enough to carry solids. Use hose layflat charts in your kit and add equivalent lengths for camlocks, elbows, and valves. If you lack charts, estimate conservatively and leave 10 to 20 percent head reserve.
- Check NPSH and priming method
- Surface pumps need enough NPSH available at the inlet to avoid cavitation. Long or undersized suction lines, hot water, or high elevation reduce NPSHa. If you are near the suction lift limit or see air binding, switch to a submersible or lower the pump closer to water.
- Select on the curve near BEP
- Choose a pump whose duty point sits around its best efficiency point. That improves reliability, lowers fuel burn, and reduces wear. If your duty point falls far left on the curve, consider a smaller impeller, throttling, or a different pump.
Worked example, field scale, metric
- Scenario: 20 m trench, 3 m deep in sandy soil, inflow estimated at 12 L/s after adding 25 percent margin. Discharge goes to a settlement tank 30 m away, then to a permitted outfall.
- Option A: 6 inch self-priming trash pump, surface set with 2.5 m suction lift, 30 m discharge in 6 inch layflat, two camlocks and two 90° bends.
- Option B: 4 inch electric submersible, flooded suction, 40 m discharge in 4 inch layflat to the same tank.
Calculations, rounded for field use:
- Static head: Option A, suction lift 2.5 m plus discharge rise 1.5 m to tank inlet, total 4.0 m. Option B, pump is submerged so static is about 1.5 m.
- Friction loss:
- 6 inch line at 12 L/s, velocity ≈ 0.84 m/s. For layflat or smooth hose at this velocity, head loss is roughly 0.5 to 1.0 m per 30 m, fittings add about 0.5 to 1.0 m. Take 1.5 to 2.0 m total.
- 4 inch line at 12 L/s, velocity ≈ 1.9 m/s. Friction is higher, about 2 to 3 m per 30 m, fittings add ~1.0 m. Take 3.5 to 4.0 m total.
- TDH: Option A ≈ 4.0 + 2.0 + 0.5 reserve ≈ 6.5 m. Option B ≈ 1.5 + 4.0 + 0.5 reserve ≈ 6.0 m.
- Selection:
- Option A is well within a 6 inch trash pump’s curve at 12 L/s and 6 to 7 m head, but watch NPSH and air leaks on the suction.
- Option B requires a 4 inch submersible capable of about 700 L/min at 6 m head, which is common.
- Decision factors: If solids are coarse and you expect debris, choose the 6 inch trash pump with a properly sized strainer and short, stiff suction. If noise limits apply or suction lift is longer or variable, pick the 4 inch submersible and upsize the discharge hose to keep friction reasonable.
- Either way, confirm on the manufacturer’s performance graph and keep the duty point near BEP.
If you lack charts on site, a quick field check is to throttle the discharge on startup while watching amp draw or engine load. Stabilize flow, then open gradually and recheck. If the pump hunts or the vacuum gauge jumps, you may be air bound or too close to suction limits.
Solids Handling, NPSH & Priming
Solids and particle size set the rules. You should match pump design to solids percent and max particle size expected:
- Vortex or recessed impellers pass larger solids but trade some efficiency for reliability. Semi-open impellers handle moderate solids with better efficiency, but clog if debris is stringy or oversized.
- Strainer sizing matters. Use an inlet strainer at least 2 to 3 times the area of the suction hose cross section, with openings sized below your pump’s solids rating to prevent a single large object from blocking the impeller eye.
- Keep velocities high enough in discharge to keep grit in suspension, but not so high that friction loss eats all your head. Long flat runs in oversized layflat hose reduce wear and energy.
NPSH and cavitation control:
- You cannot cheat physics. At sea level, you only have about 10 m of atmospheric head, so real-world suction lift limits sit near 7 to 8 m once you include vapor pressure and suction losses. Beyond that, NPSHa collapses and cavitation destroys performance.
- Signs you are in trouble include rumbling, fluctuating discharge pressure, and pitted impellers after a few shifts. Fixes include lowering the pump closer to the water, enlarging and shortening the suction hose, reducing flow, or switching to a submersible with flooded suction.
Priming and air binding:
- Surface pumps need reliable priming. Vacuum assist or dry-prime systems help purge air from long or uneven suction lines. Every camlock and gasket on the suction side must be airtight. Even a pinhole lets in enough air to lose prime under high vacuum.
- Avoid high points in suction runs where air can accumulate. Install an air release at the crown if the route cannot be straight. Keep foot valves clean and ensure O-rings are seated. A skim-type floating suction helps avoid vortexing and air when water level falls.
Power, Fuel & Noise on Urban Jobs
If you are working next to residences, a school, or a hospital, sound and exhaust may decide the pump type before anything else. Electric submersibles, placed below water, run quietly and avoid on-site emissions. With VFDs, you can trim speed to hit the duty point exactly and save energy across partial load.
Diesel self-priming units are flexible where power is scarce. They bring their own engine and are quick to deploy with dry-prime capability and built-in vacuum assist. The tradeoffs are noise, fueling logistics, and maintenance. Noise-rated canopies and baffling reduce sound, but many sites still restrict diesel operation overnight. If shifts require 24-hour drawdown, deploy electrics for nights and diesels for daytime heavy moves, or park a generator well away from sensitive receptors.
Cost differs by site. Multi-week runs often favor electric where grid power exists. Diesel costs stack up through fuel, filters, oil changes, and downtime for service. Hybrid approaches are growing too: battery-backed electric pumps for standby with auto-start, solar trickle charging for small flows, and propane engines in zones sensitive to diesel particulate are all realistic options for today’s urban projects.
Setup & Commissioning Checklist
Get the basics right the first time and your crew avoids late calls.
Job-site checklist
- Site survey, utilities, and stability: access, trench boxes, pump pad, and safe egress confirmed.
- Inflow estimate with contingency: record assumptions and flood margin.
- Suction depth and hose run laid out, bends minimized, suction lift verified below 7–8 m.
- Priming method decided: self-priming, vacuum assist, or flooded suction.
- Discharge permissions and route: permits, silt/turbidity control, settlement tanks, and outfall protection in place.
- Power/fuel plan: cable runs, generator size, spill kits, refueling schedule.
- Standby pumps and auto-start logic: duty/standby (N+1), floats, and check valves.
- Noise limits and hours: enclosures, placement, neighbor notices.
- Monitoring: flow checks, drawdown targets, turbidity sampling points.
- Daily maintenance: strainers, hoses, fuel, oil, greasing, and recordkeeping.
Commissioning steps
- Inspect pumps, hoses, layflat routing, and camlocks. Support risers and protect against kinks.
- Verify strainer sizing, install foot valves if applicable, and ballast the suction to avoid vortexing.
- Prime the system. Confirm vacuum holds and there are no air leaks on the suction.
- Ramp up slowly. Use gauges or amp draw to settle at the duty point.
- Log initial readings: flow, head, drawdown, noise observations, and turbidity at discharge.
- Test auto-start and alarms. Confirm standby pumps take over on low level or high level as planned.
Monitoring through the job
- Check seals, intake screens, and discharge condition every shift.
- Sample discharge as your permit requires and document results. Take upstream background when needed to compare against turbidity benchmarks used by many states.
- Desludge settlement tanks and swap filter bags before head loss becomes excessive.
- Track drawdown against targets. If the groundwater table rebounds, adjust pump staging or add points.
Common Mistakes and How to Avoid Them
- Air leaks on suction lines: A single leaky camlock on the suction side can defeat a vacuum assist system. Pressure test suction segments with water before start, replace gaskets, and tape threads. Keep suction routes short and straight.
- Undersized discharge hoses: Running a long 4 inch line at high velocity invites friction losses and starves flow. Upsize the layflat on long runs, keep velocities in a practical range, and add quick couplings where you must break lines.
- Ignoring suction lift limits: Trying to pull from 9 or 10 m will waste time. Lower the pump, dig a sump, or switch to a submersible. Treat 7 to 8 m as your ceiling, and add margin for warm water or higher elevations.
- Poor strainer practice: No strainer or an opening larger than your impeller clearance is a recipe for blockage and seal failure. Use a durable basket, clean daily, and lash it to avoid bottom suction into sludge.
- No redundancy on critical pours: For foundation slabs or TBM launch chambers, a single pump is a single point of failure. Use duty/standby arrangement with auto changeover, backflow checks, and separate power.
- Discharge without treatment: Pumping straight to a storm inlet with silt present risks stop-work orders. Install settlement tanks, filter bags, or floc units to meet permit limits, and log turbidity or TSS as required.
- Skipping BEP checks: Selecting a pump far from its best efficiency point leads to vibration, heat, and premature wear. Check the curve, trim the impeller if needed, or select the next size down to bring the duty point into the efficient band.
- Forgetting by-pass pumping during maintenance: If you must service the primary pump, set a temporary by-pass line and have a standby pump ready. Flooding a trench because of a preventable gap is expensive.
- Loose fuel and cable management: Refueling over open ground or unprotected cables across haul routes ends badly. Secondary containment for fuel, proper cable ramps, and designated refuel windows prevent outages and incidents.
- Discharge restrictions ignored: Municipalities often limit where and when you can discharge. Confirm permissions, log flows, and notify authorities before starting. This is as important as the hydraulic design.
FAQs
Q1: What size pump do I need for a 3–4 m deep trench?
Start with inflow. For a moderate trench, 5 to 15 L/s is common. Add static head to your discharge point and friction for the hose run, then pick a pump that delivers that flow at the resulting TDH with 20 percent reserve. A 3 to 4 inch submersible or a 4 to 6 inch trash pump often fits.
Q2: Self-priming trash vs submersible—when to pick each?
Pick self-priming when debris load is high, access is easy, and suction lift is short. Pick submersible when noise and emissions matter, suction lift is excessive, or you need simple unattended operation in a deep sump.
Q3: How do I estimate TDH on a flat site vs a shaft?
On flat sites, TDH is mostly friction plus a small elevation rise to your outfall. In a shaft, add vertical static lift from pump to discharge, then friction and fitting losses. Always include a small reserve for fouling.
Q4: What priming issues cause loss of suction on startup?
Air leaks at camlocks, a dry casing, a stuck foot valve, or a high point trapping air. Check gaskets, fill the casing, bleed air at the crown, and use vacuum assist for long or uneven suction lines.
Q5: What hose diameter should I use for 6″ pumps on long runs?
Use 6 inch layflat at a minimum. On very long runs or higher flows, step up a size where practical to cut friction. Keep velocities moderate and use gentle bends with properly rated camlocks.
Q6: How much suction lift is realistic in the field?
Treat 7 to 8 m as the practical limit, lower if water is warm, elevation is high, or suction hoses are long or rough. If you are near that limit, go submersible or lower the pump into a sump.
Q7: Do I need a standby pump (N+1) for critical pours?
Yes. For slabs, base mat pours, or tunnel breakthroughs, duty/standby with auto-start is standard practice. Provide independent power where possible and install check valves to prevent backflow.
Q8: How do I control silt/turbidity in the discharge?
Route flow through a settlement tank and filter bag. For fine clays, dose a coagulant or polymer in a mixing tank before filtration. Sample regularly and record results per your permit.
Q9: Diesel vs electric—what’s cheaper for multi-week jobs?
If grid power exists, electric submersibles usually win on operating cost and noise. Diesel works where no power is available but adds fuel, service, and potential noise penalties. Run the numbers for your flow and head.
Q10: What daily checks extend pump life and avoid downtime?
Clean strainers, inspect hoses and camlocks, verify oil and fuel levels, test floats and auto-start, and log drawdown and flow. Look for vibration or cavitation sounds and fix problems before they escalate.